I was sitting on the edge of a stiff bed in a very generic hotel room. It was 6:00 AM. I had a massive corporate meeting in two hours, and I desperately needed to wake up.
I looked at the small wooden desk in the corner of the room. Sitting next to the television was the standard hotel coffee maker. It was a tiny, cheap plastic machine covered in dust. Next to it sat a flat foil packet containing a mysterious dark powder that claimed to be “Premium House Blend.”
I refused to drink it. I knew exactly what that foil packet tasted like. It tasted like cardboard and regret.
Fortunately, I had anticipated this exact scenario. I unzipped my carry-on suitcase and pulled out a small cloth bag. Inside the bag was my hand grinder, a small digital scale, a bag of fresh coffee beans from my local roaster, and a strange plastic contraption that looked like a giant medical syringe.
This was my AeroPress.
I had owned the device for six months. Despite its massive popularity on the internet, my relationship with it was incredibly frustrating. I had watched dozens of videos. I had read countless forums. Every time I used it at home, the results were wildly inconsistent. One day the coffee would be bitter. The next day it would be sour. I was on the verge of throwing the plastic tubes in the trash.
But sitting in that bleak hotel room, with no other options available, I was forced to confront the device one more time. I decided to strip away all the complicated internet advice and trust my own instincts. That quiet morning in a strange city was a massive turning point. It was the morning I finally got my AeroPress recipe right, and it completely changed how I travel.
The Problem with Too Many Variables
The AeroPress is arguably the most versatile coffee brewer ever invented. This versatility is its greatest strength, but it is also its biggest flaw for beginners.
If you buy a standard pour over cone, the rules are fairly rigid. Gravity pulls the water down. You only have so much control.
The AeroPress breaks all the rules. It uses full immersion, meaning the coffee and water sit together in the plastic chamber. But it also uses pneumatic pressure. You physically push a rubber plunger down to force the liquid through a tiny paper filter.
Because you control the steep time, the water temperature, the grind size, and the physical pressure, there are infinite ways to brew a cup.
When I first bought it, I tried to copy the recipes of World AeroPress Champions. These recipes were absurdly complicated. They required flipping the brewer upside down. They required stirring exactly exactly three times. They required plunging for exactly forty five seconds.
I was overcomplicating the process. I was trying to run before I knew how to walk. I realized my inconsistency was a direct result of changing too many variables at once.

The Hotel Room Reset
I set my gear up on the small hotel desk. I decided I was going to ignore the championship recipes. I was going to engineer a simple, foolproof baseline recipe.
First, I had to fix my physical setup.
The internet loves the “Inverted Method.” This involves balancing the plastic tube upside down on the rubber plunger, adding the water, and then dangerously flipping the entire device over onto your mug before pressing. I had tried this at home. I ended up knocking the brewer over and sending boiling water and wet grounds flying across my kitchen.
I was not going to risk burning myself in a hotel room. I decided to use the standard, right side up method.
I placed a tiny circular paper filter into the plastic cap. I rinsed the paper with hot water from the hotel sink. I screwed the cap onto the bottom of the brewing chamber and placed the entire device squarely on top of a heavy ceramic mug. The foundation was secure.
Dialing in the Grind Size
Next, I had to address the coffee itself.
When I first started using the AeroPress, I treated it like an espresso machine. Because the device uses pressure, I assumed I needed to grind my coffee as finely as possible. I would grind the beans into a fine dust.
This was a massive mistake.
When you use a fine dust in an immersion brewer, the water extracts the flavors instantly. If you let the water sit for even ten seconds too long, it pulls out aggressive, harsh bitter compounds. The fine dust also clogs the tiny paper filter, making the plunger impossibly hard to push.
Learning this physical limitation completely changed my approach. This realization was the exact catalyst for What I Discovered About Grinding Coffee Too Fine when I audited my kitchen habits. I needed to slow the extraction down.
I took my hand grinder and adjusted the ceramic burrs. I moved away from the fine espresso setting. I dialed it back to a medium fine setting. The grounds looked like standard table salt.
I weighed exactly 15 grams of the medium fine coffee and poured it into the plastic chamber.
The Temperature Epiphany
The next variable was the water.
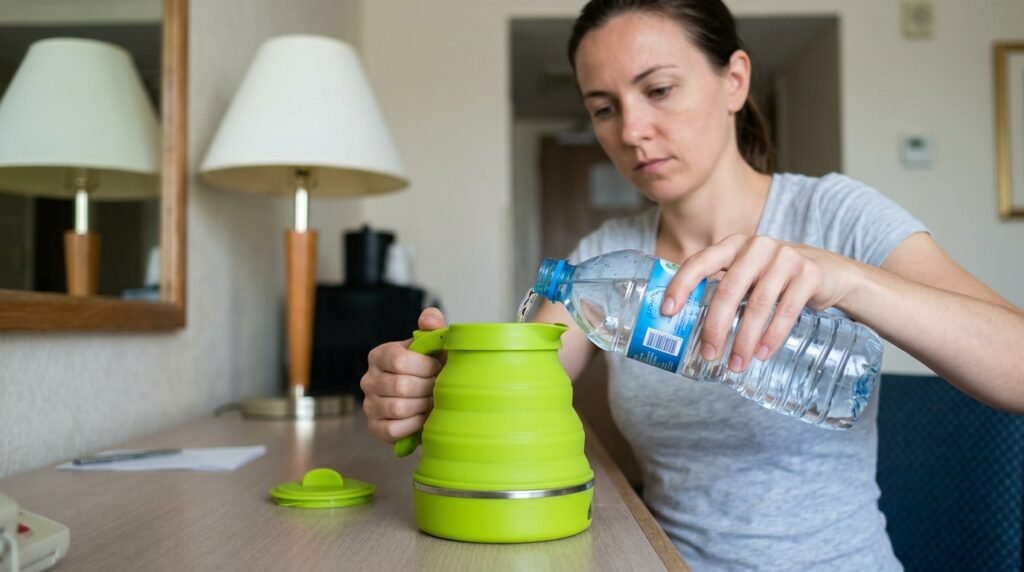
I had brought a cheap, collapsible electric travel kettle with me. I filled it with bottled water and hit the power switch. The kettle did not have a temperature gauge. It just boiled the water aggressively and clicked off.
At home, I always used water directly off the boil for my pour over coffees. Light roasted beans need high heat. But the AeroPress is a completely different thermal environment.
Because the plastic chamber traps the heat, and because you are immersing the coffee completely, boiling water often scorches the grounds. It leads to a heavy, ashy flavor.
I let the travel kettle sit open for two full minutes after it clicked off. I let the extreme heat dissipate. I brought the water down to roughly 185 degrees Fahrenheit.
Using cooler water in the AeroPress feels completely counterintuitive. It feels wrong. But experiencing the sweet, smooth results of this specific thermal shift is exactly How I Discovered the Right Water Temperature for Coffee without relying on expensive digital thermometers. Lower heat prevents over extraction in the plastic chamber.
The Simple Pour and Stir
With my 15 grams of coffee in the chamber and my cooler water ready, I started my phone timer.
I did not do a complicated, multi stage pouring routine. I just poured the hot water steadily until the scale read 250 grams. The water filled the plastic chamber almost to the very top.
I grabbed the small plastic stirring paddle that came in the box. I gently stirred the mixture front to back exactly three times. I just wanted to make sure all the dry grounds were fully saturated.
Then, I took the rubber plunger and inserted it into the top of the chamber at a slight angle. I pulled back very gently to create a vacuum seal.
This vacuum seal is the hidden secret of the standard method. By sealing the top, you stop the gravity drip. The liquid stops leaking out of the bottom filter. The coffee and water sit perfectly suspended in the chamber.
I stepped back and looked at my phone timer. I decided to wait exactly two minutes.
The Physics of the Plunge
The two minute mark arrived. It was time for the defining feature of the device.
I placed both hands firmly on the top of the plunger. I did not push down with all my strength. Many people try to force the plunger down as fast as possible. This creates channels in the coffee bed and ruins the extraction.
I let the weight of my arms do the work. I applied a gentle, steady downward pressure.
I felt the resistance of the water pushing through the coffee grounds and the paper filter. The plunger slowly crept down the plastic tube. The entire pressing process took about thirty seconds.
At the very bottom of the press, I heard a distinct hissing sound. This was the compressed air pushing the last drops of liquid through the puck of coffee grounds. I stopped pushing immediately. If you press hard through the hiss, you squeeze out the bitter oils trapped at the bottom of the filter.
I lifted the plastic device off the mug.
The Moment of Truth
I carried the heavy ceramic mug over to the hotel window. The sun was just starting to rise over the city skyline.
The liquid in the mug was incredibly dark and completely opaque. There was a thin layer of natural coffee oils floating on the surface. It looked heavy.
I took a slow sip.
My eyes widened. The flavor was absolutely spectacular. It was completely free of the harsh, muddy bitterness that had ruined my previous attempts. It was thick, heavy, and deeply comforting.
I was brewing a washed Colombian bean. For the first time, I could actually taste the specific notes the roaster promised on the bag. I tasted a massive hit of sweet caramel, followed by a crisp, clean apple acidity on the finish. The texture was buttery and smooth.
I had engineered a masterpiece using a plastic tube in a cheap hotel room.
The Ratio That Fixed Everything
As I drank the cup, I realized exactly why this simple recipe worked so perfectly. It came down to the mathematical balance of the ingredients.
By using 15 grams of coffee and 250 grams of water, I had utilized a 1 to 16.6 ratio.
In my previous, failed attempts, I was guessing. I was using too much coffee and too little water, creating a sour, concentrated mess. Locking in this specific mathematical baseline was a profound culinary lesson. It is exactly How I Discovered the Perfect Brew Ratio for Myself across all my different brewing devices.
The ratio gave the water enough volume to pull out the sweet flavors, while the cooler temperature prevented the bitter flavors from taking over. The medium fine grind provided the perfect physical resistance for the thirty second plunge.
Every single variable worked in perfect harmony.
The Ultimate Travel Companion
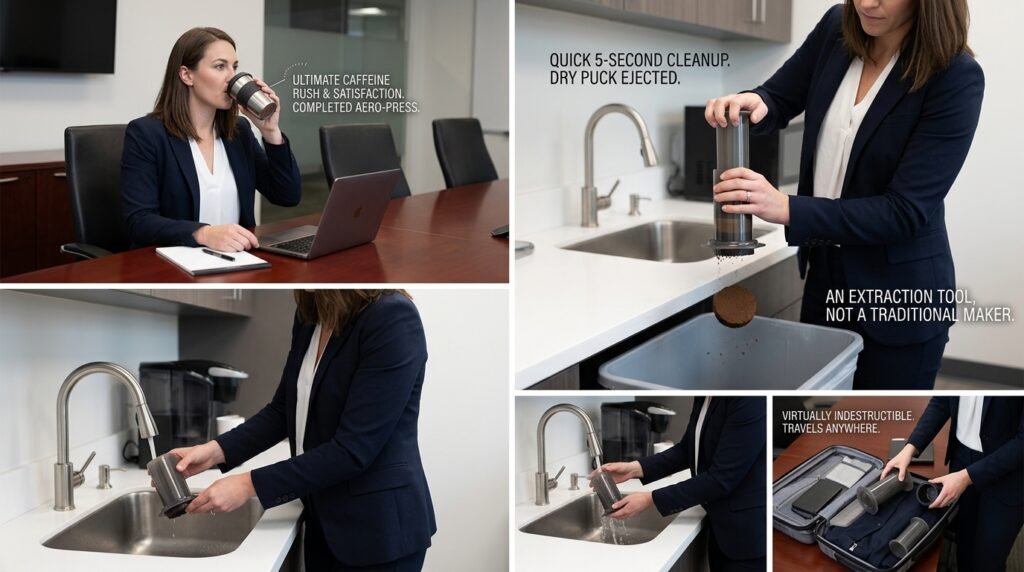
I finished the mug, feeling an incredible rush of caffeine and satisfaction. I was completely awake and ready for my corporate meeting.
The cleanup process took exactly five seconds. I unscrewed the plastic cap, held the brewer over the hotel trash can, and pushed the plunger one final time. A perfectly dry, solid puck of coffee grounds popped out of the tube with a satisfying thud. I rinsed the rubber seal under the sink. The device was clean.
Sitting in that room, I finally understood the cult following of the AeroPress.
It is not a traditional coffee maker. It is an extraction tool. It bridges the gap between the heavy, oily body of a French Press and the clean, paper filtered clarity of a pour over cone.
It is virtually indestructible. You can throw it in a suitcase, drop it on a tile floor, or take it on a camping trip. It requires no electricity. It requires no delicate glass carafes.
Finding Your Own Recipe
If you own an AeroPress and you are frustrated with the results, you need to simplify your approach.
Stop watching videos of people brewing upside down. Stop buying expensive metal aftermarket filters. Go back to the absolute basics.
Use the standard method. Use a medium fine grind. Let your boiling water cool down for a few minutes. Measure your coffee and your water with a digital scale. Insert the plunger to create a vacuum, wait two minutes, and press gently.
Once you establish a solid, reliable baseline recipe, you can start tweaking the variables one by one. You can experiment with shorter steep times or hotter water. You can push the boundaries of extraction.
The AeroPress is a blank canvas. It demands your attention, but it rewards your patience. That simple hotel room victory completely eliminated my reliance on terrible commercial coffee. It gave me the power to brew café quality cups anywhere in the world. Grab your plastic syringe, lock in your ratio, and take control of your morning.